This tutorial shows how to draw create a digital illustration of a mad scientist doing a crazy experiment! I was asked to write this tutorial by CGTALK.COM for their articles section (see here). Also, this tutorial was featured on the book Digital Sci-Fi Art: A Step-by-Step Guide to Creating Stunning, Futuristic Images by Ilex Press.
Notes:
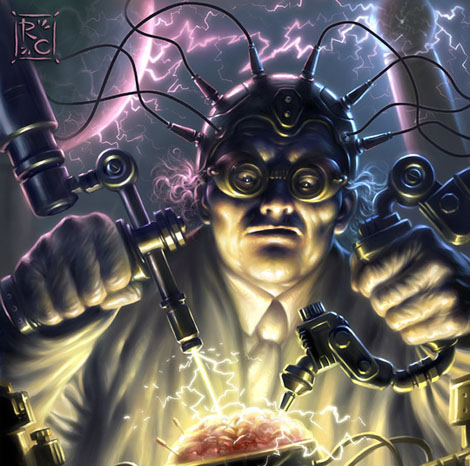
This illustration was part of a series of 14 images I did for a trading card game called “ShadowFist“. At the time I was also coloring pages for a comic series, thus getting these pieces done quickly was a priority. I had to lose some sleep, but it was a worthy and fun project. The card’s description called for a classic mad scientist working on some kind of gadget in his lab, with sparks and electricity all around. Given the time constraints and keeping in mind that this piece would be printed at a very small scale, less than 2 inches, I opted for a somewhat simple approach, a few foreground elements with minimal background and one or two light sources.
First thing I did, was concentrate on the description and pose a few questions, such as: what was the scientist working on? The idea of a robot came to me right away, but then I decided to go for a cyborg, since that allowed me to add a touch of gore (see the brain?) in the picture — after all, the scientist had to look crazy!
Then, I had to tackle the problem of where the sparks had to come from, and in a flash (how appropriate), I remembered a recent trip to a science museum (Cambridge, MA), where I had seen 2 huge Tesla coils produce some spectacular and loud electric sparks: I thought they would be perfect for the background. All in all, I wanted the final piece to be reminiscent of the amazing pulp magazine covers from the 40s and 50s, but with a few modern twists.
Step 1 – The sketch
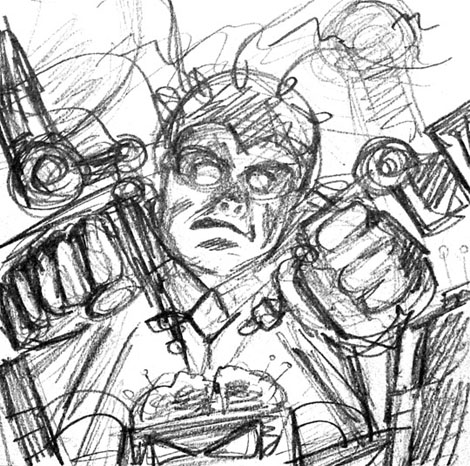
Having already a pretty good idea on the elements and subject of the illustration, I moved on to the sketching phase. The sketch consisted of a few shapes and lines, very rough, with the goal of finding the right composition. After one failed attempt, where the image wasn’t interesting enough, I made a new sketch (in about 2 minutes) and gave it a somewhat slanted angle point of view in the hope that it would add a hint of action to it. In order to avoid time consuming surprises later on, I made sure to include all the elements planned for the final image during the sketching process.
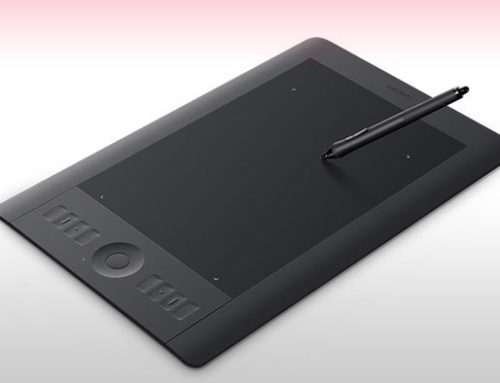
Once happy with the sketch, I tucked it away until a few days later, when I re-drew it on the computer by tracing its lines over using Painter and a Wacom Tablet.
The CG sketch was a low resolution 72 DPI image, I used the pencil tool with a small brush and 100% opacity setting over a sepia background. I always sketch at low res, so everything is faster. I did not worry about cleaning up lines or details at this point.
Step 2 – Blocking
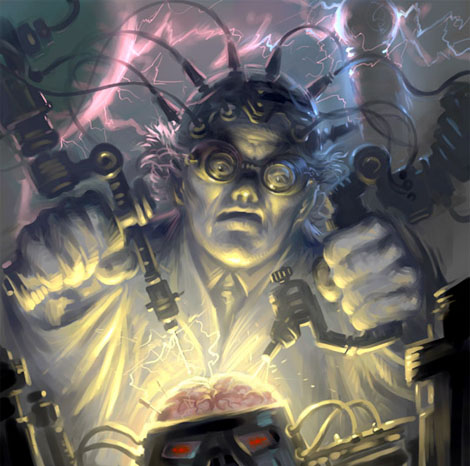
For the main blocking phase, I continued using Painter. I resized the image to 300 DPI, about 7 inches in size. I switched to the Airbrush tool with a medium sized brush and medium opacity (see “Brushes” image) setting.
Usually, I go through this phase as fast as I can, only concentrating on shapes, volume (light and shadow) and color. I try to let the process be automatic, avoiding stopping too often to THINK, rationalize and analyse what I am painting from my imagination. I picked a few base colors, I put them in a corner of the image for later reference and then I started filling up all the various areas, right over the original traced sketch (single layer flat image). Nowhere in the blocking process did I add fine details, and for this reason I usually force myself to keep using the same brush size. Then by using the color wheel to pick a lighter or darker color than the base, I painted highlights and shadows. During this stage I used the ALT key often to pick colors while I moved from area to area.
Step 3 – Painting and details
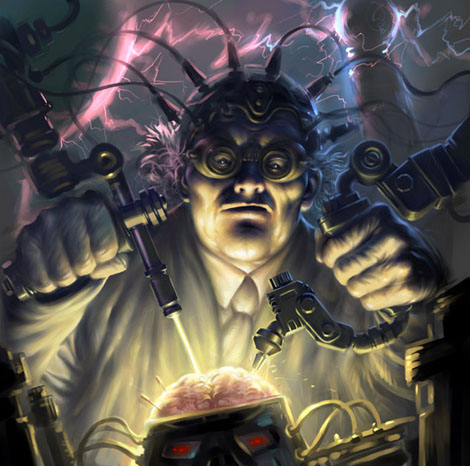
This is the main stage where I refined shapes and added details to the foreground elements. Here I concentrated on reshaping all the forms to their final position and dimensions. I switched to the Painter “Brushes” tool, a medium opacity setting (see “Brushes” image), varying brush sizes, but with regular small and more carefully positioned strokes. I soon realized that in order to achieve a higher level of realism for the face and hands of the main character, I had to rely on some reference material.
Using a cheap digital camera (an invaluable tool for the digital artist) I snapped a few pictures of my face and hands illuminated by a light source coming from below. I imported the low res photos into Painter, de-saturated them and kept them handy while I was finalizing the face and head elements.
The rest of the elements were done completely from imagination, as they mostly consist of simple shapes, it was not too difficult to imagine how the light sources would play on them.
Notice that at this stage the background and some of the foreground (the cables coming out of the scientist helmet) are not refined yet (see “Step 3” image), I left them for the next phase, when I imported the image to Photoshop.
There isn’t much else I can say about this part of the process, besides the already mentioned technical notes, because the painting stage mainly involves the artist’s subjective ability to render objects. It is a skill that can be learned by simple practice and dedication.
A good sense of observation and self criticism are some of the key requirements. I can offer a trick or two though: often while you paint something, flip the canvas horizontally. By doing so, you can instantly see if anything is out of place. Additionally, zoom out until the image is much smaller then the current size you are working on, so that you can see it in its entirety, as this also helps in finding out flaws.
Once in a while, is also useful to make a copy of the current state of the artwork, de-saturate it and look at it for a few minutes, to try to discern problems with contrast and volumes.
Step 4 – Effects and final adjustments
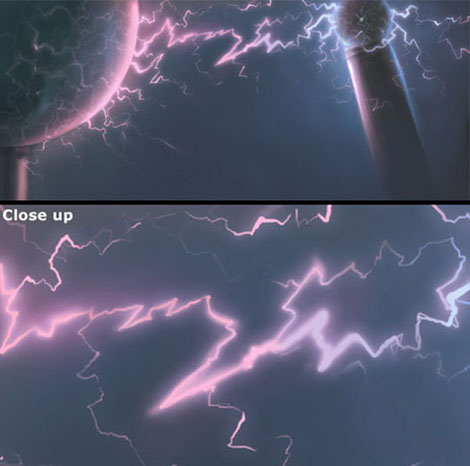
I imported the image into Photoshop, copied the canvas layer and cut the foreground elements from the background using the eraser tool.
Now I had the foreground elements (scientist and the gadgets) separated on a layer called “FG”. I then turned off this layer, and proceeded to paint over the background on the canvas layer (that I then renamed “BG”).
Using a large simple round brush, set on normal mode, I fixed up the background colors, then refined the Tesla coil�s shape. I added a new layer on top of the BG, this new one called “Sparks”, where I painted the electric sparks using a 100% hardness brush, with a pink/bluish color. To add the glowing effect to the sparks, I added an Outer Glow effect in the layer blending options. I then merged the BG and Sparks layers together.
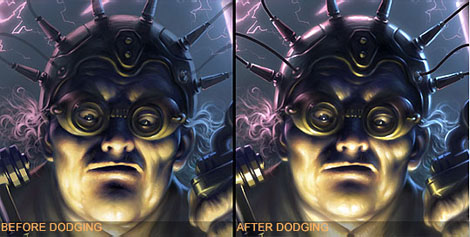
Now, I turned the FG layer back on to check if the new background would go well with it. Luckily enough it all fit well together. At this point, I added a new layer on top of it all, and painted the cables coming out of the scientist helmet, then I added a soft “Outer Glow” effect to them. Then I added the sparks coming out of the tools held by the scientist, using the same technique as the earlier sparks, but this time I used a light yellow color.
Now, I flattened the whole image into a new layer and noticed, that the painted highlights were not bright enough, so I switched to the Dodge tool set on highlights, which I used over all the spots that I felt needed to be brightened up and brought to prominence. I especially like to add “back” or “incidental” light sources to elements in my illustrations, so here I punched out all the edges that were illuminated by the electric sparks in the background as well as the other areas in the foreground that were illuminated by the yellow sparks.
Final Image
A Tip: Did you know you can register your domain name, get web hosting, and even find ecommerce software at Network Solutions? Go with a name you can trust when you’re ready to start your online presence.

Outstanding.
I kinda hoped you’d mention where I could find this poster for sale 🙂
Hi Tarex!
Thanks!
You can find it in my Prints store 🙂
Wow your work is very nice and thanks for the tutorials you’ve posted. I have a question though. Would you approach a layout background the same way you would when you digitally paint a character like the Wonder Woman one?
Very nice image. I want to include it in my blog in the same way and similar reason was made by Mr Linch in their own. But I want your permision first, of course I will mention your name and origin.
It will not be used for any other porpose and far from the post I want to hang that talks about the conflicts between belivers and deniers in the “cientific field”.
Thanks and congratulation for your nice job. I already link your post to mine.
Many thanks and kind regards.
May I have your permission to use this image in the powerpoints for a lecture I am giving to the Wisconsin Student Nurses’ Association on electrophysiology? I will give you credit both in the slide and in the list of references. I do not plan on making thepowerpointsavailable through the web, but if the association asks to do so, would we have your permission to include your image?
Thank you,
Pat Bowne
Biology, Alverno College
Pat: Of course! 🙂
Carlos: Please, feel free.
Everybody else, thank you so much for your comments!
u must put so much effort in it how long did it take u to finish all this
Dear Roberto,
Hello! My name is Monica Stewart from Casper, Wyoming. I tried to send you an e-mail, but wasn’t sure if you had received it. My Husband & I recently entered a t-shirt logo contest. We will not receive any royalties from this contest if chosen, just something fun that we did. We had used your Mad Scientist piece of artwork with some of our own photo shopping, along with some other logos that we created. Much to our happiness, our logos were chosen for semi-finalists in the contest! We were asked to submit a release form and wanted to know if it was possible to get your permission to use it. We really enjoyed your artwork! You are a very talented artist! I appreciate your time for consideration.
Thank you,
Sincerely,
Monica Stewart
Very Cool!
Aloha, I’m interested in using your depiction of this sketch as art announcing a Halloween function at ‘Imiloa Astronomy Center. Please let me know if you prefer not. All the best, Tiffany Edwards Hunt
Hi 🙂
I’m making a redesign for fyysika.ee – main Estonian site about physics for people interested in science. Can we use this picture in our design with credits and link back to http://www.robertocampus.com?
Thanks,
Kirill
[…] Photoshop and Painter Tutorial: Mad Scientist […]
Hi 🙂
I am planning to give my dog a tattoo, and i love your artwork!! Can i please have your permission to use your artwork for this if i put a link underneath?
Thanks,
Si
at first:i wannt to apologize for my poor Engllish to u. I really really love this pic so much. and this pic i think it can show the everything in human beinds about the final truth。like the NIO(the Matrix) know the answer of the whole Universe。.U’re the best.keep going. a Chinese guy visit.